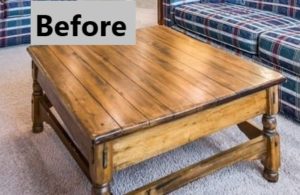
The coffee table was a thrift store FIND, wobbly legs, a loose side arm and an inch of dust. As the saying goes “One man’s trash is another man’s treasure.”
Of course, the table has seen better days, but beauty will be seen through a simple restored/revive process with using a distressed style transformation.
Design techniques can be challenging but exciting! The passion of how you can restore something into AMAZING by following a few simple instructions is such a reality!
The coffee table has unique characteristics and to bring the transformation from oak table to a trendy distressed style, is a just few steps away.
Let’s start with gathering a few supplies and focus on a DIY vision.
What supplies are needed?
SUPPLIES:
- Sandpaper 80 Grit & 220 Grit
- Paint (Rust-Oleum Finish Milk Paint, Kensington Gray) LEGS & SIDES
- Paint (Prestige Paints Agreeable Gray) TOP
- Stain (Minwax Wood Finish – Dark Walnut) TOP
- Protective Finish (Minwax Polyacrylic Protective Finish) TOP
- Paint Brush (2-inch)
- Foam Brush
- Painter Rags
What’s the next step?
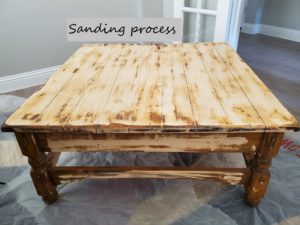
The goal is to sand all the surfaces and bring out the existing wood grain. Begin SANDING with a 80 Grit sandpaper to remove the old stain. Then switch to the 220 Grit sandpaper for the final sanding and for the desired finish.
Clean all surfaces with a damp cloth and prep for the next step.
PAINTING THE BOTTOM PORTION OF THE TABLE

The prep area needs to be clean and free of any dust. Lay some plastic on the floor and flip the table upside down. Begin to paint the legs and side rails with the suggested furniture paint.
The paint is more expensive but application is easy by using even paint strokes for an overall good coverage. Let the paint dry overnight.
STAIN THE TOP PORTION OF THE TABLE
The decision for a distressed look, the process was simple and effortless. Begin by staining the top of the table. Using a foam brush to apply the stain with even strokes.
Then take a painters rag and rub off the excess for an even application. The stain used for this project is a Minwax Dark Walnut. Don’t forget to stain all sides of the top portion of the table top.
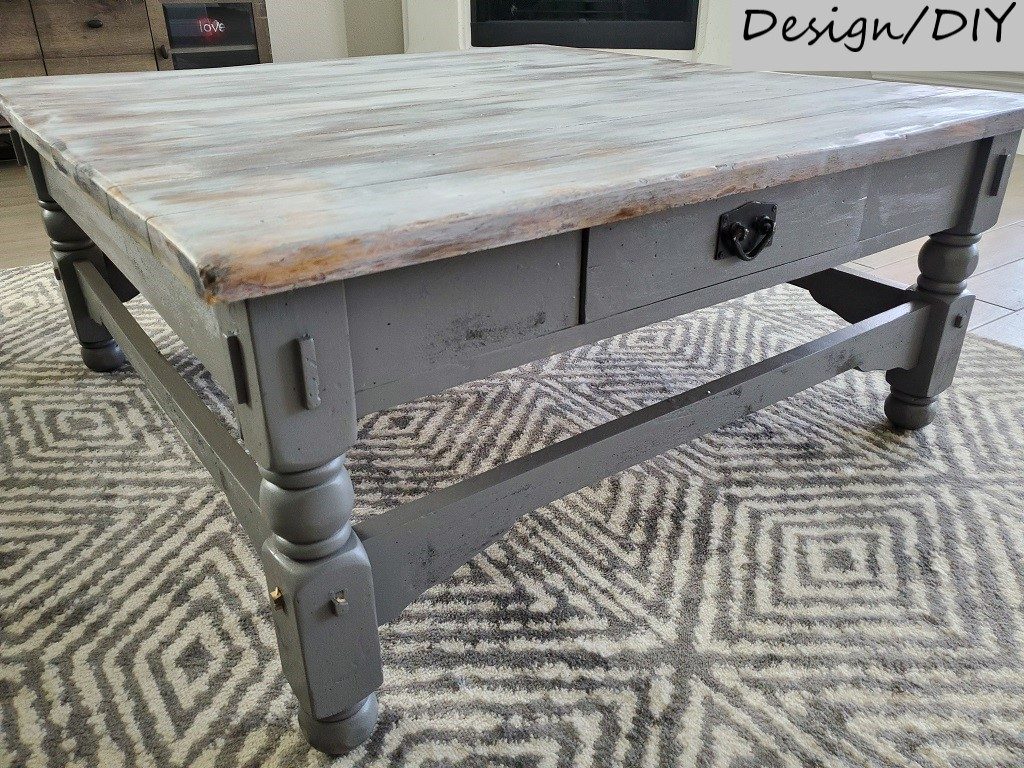
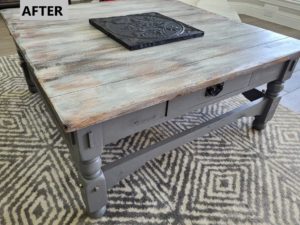
Next, to achieve the distressed look, select a paint choice of a lighter shade, either an off-white or gray to give the effect of the distressed look.
Any left over paint is an excellent option too. The paint selected for the table is Prestige Paint (Agreeable Gray) and follow the paint technique for the next step.
Use a 2-inch paint brush, dip the ends of the paint brush and with a delicate touch, use light brush strokes on the stained top surface.
Next, by using a painters rag, lightly rub the paint off. This will give a distressed look by alternating paint strokes and “rub off” techniques. Continue the process until the desired look is acceptable. Let the paint dry completely.
FINAL TOUCHES
The table top will need a final finish by applying a clear coat with a foam brush. Next, apply one even coat, let dry and repeat the step to achieve a protective layer for the table top.
Follow a few simple instructions and start your project today, with your furniture FIND! This DIY vision, will showcase a NEW feature in your home or office!
BEFORE & AFTER PICTURES
 Thank you for visiting OUR BLOG and make sure you subscribe to receive news and updates! #diyfurniture #refurbishtable #paintfurniture #remodeldesign #blogger #followme #wow #pellrevive